
Securing Your .NET (6.0+) Api: A Guide to B2B Authentication (part 3)
- OLIVIER VERPLANCKE

- Jan 15, 2023
- 18 min read
Updated: Mar 20
This blog post is about how you can secure your API's using Azure to prevent unauthorized access.
Part 1 is how to set up an API from zero using versioning and swagger.
Part 2 is how to authorize as a user to the secured API.
Part 3 (this post) is how to authorize from 1 API client to another, B2B.
Part 4 is how to implement scope based access.
Part 5 is how to set up 'advanced' configuration: multi environment, secrets ...
Part 6 is how to set up code-first migration using Entity Framework with SQL Server

Image by rawpixel.com
Introduction
Technology we'll be using:
.NET 6.0 (.NET 10 recently released - recommendation is to set up your APIs in 10)
Azure - Microsoft's cloud platform
Requirements, what do you need:
Azure portal account - we're using Azure as our Identity Provider. Go to https://portal.azure.com and sign up for free.
Understand oauth principles - explained in Part 2
Solution of Part 2 - github repo
TLDR
For demo purposes we'll add 2 new app roles, similar to the scopes configured for the interactive flow. Know that client-credential configuration (app roles) and authorize code configuration (expose an api) certainly do not need a 1 on 1 match in number of scopes / roles. This is just to illustrate certain functionalities.
Add new app roles: authdemoapi.read and authdemoapi.manage
Add new app registration: authdemo-apiclient-dev
Allow new app roles in new client
Add new console application in solution
Configure new IDP client for console
Configure /.default scope
Add code to fetch Access code from AAD
Secure HTTP GET /movies endpoint
Call authdemo api endpoints using acquired access token
The result of this post can be found on my github repo.
This part is about API to API communication aka B2B. When setting up modern software architecture, in enterprise environments, today's business standard is to use Micro Services. Preferably having an API first approach. I won't go over the pro's and cons of Micro Service architecture in this post. This is another topic for the future. If you cannot wait, I recommend you to read the book "Clean Architecture: A Craftman's Guide to Software Structure and Design" by Uncle Bob.

Let's begin!
Configuration in IDP
Like our previous post, part 2, we first have to configure our IDP.
Configure application only permissions - App roles
Add a new API client
#1 - App roles
Configuring permissions for API to API communication, we no longer are asking a user permission to request access to a certain resource. As there is no user in the equation.
There are however 2 types of access scenarios:
Delegated access - on behalf of a user

App only access - without a user

The one we'll be configuring for this demo is app only access.
Whenever we set up an api client, we have to define our list of permissions. However, because there is no user interaction between APIs, this means we need to configure all our required permissions up front. This would mean we add our list of permissions in the IDP and again have to configure this in our client API code. For this, with Microsoft's IDP at least, you can use the /.default scope. This means we don't require to configure all of the scopes our API has access to in our configuration file of the application. We can just use api://authdemoapi/.default
What do I mean with that?
If you configure in your IDP: API Client A has access to scope "read" and "manage" of API B, why would you again have to configure this in your API configuration?
If an API has no need for a given permission anymore we just remove it in the IDP. If the /.default configuration isn't possible, it means we would have to enter all scopes in our api client configuration every time. It's not a lot of work, but developers are lazy and like to keep things simple.
Example:
Instead of having to configure: api://authdemodev/authdemoapi.read api://authdemodev/authdemoapi.manage
We can just configure it like: api://authdemodev/.default
Even when we decide to add more permissions in the future, new feature requests by management ..., we don't have to adjust our configuration of the api client. Obviously you'll have to change your codebase itself to be aware of those new permissions.
Note: I put part of the scope in red color to make it clear it is different than the permissions of our Swagger setup. I did this intentionally. I like it to be clear which scopes are meant for UI applications and which ones are meant for B2B. In this case I did it by adding the word api as a suffix. This makes it visually clear this is an App Role, which is used in our API to API flows.
Yes, but why don't we do /.default scope for our authorize code flow (used for apps with end-users)?
Because in this scenario, the app acts on behalf of a user. The user still requires to give their consent. They can decline access to their files, but allow access to their public profile. Using /.default requires our app to ask all permissions up front, which we don't want.
There is something called Dynamic Consent in Microsoft's Azure AD. Dynamic Consent allows developers to ask for permissions at any time. Rather than asking all permissions your app is authorized to do up front, it can ask it at the time it makes sense. Like when a user clicks on "export list of favorite movies", at that time you can show the permissions screen to ask permission to save files to your onedrive.
This functionality works out of the box when you use the Azure AD (AAD) v2 endpoints (which we are).
Situation: We have our movie app. A user wishes to see what movies we offer. For this, (s)he needs to log in. Our app however has functionalities like exporting your favorite list of movies to your onedrive, or change content on your site collections.
If the user sign's up and log's in, we don't wish to show him this list of permissions just because the app has certain capabilities like uploading files. The user might think: "I only wanted to see what movies there are and now I'm asked to give full access to my onedrive? I'll go check another site". I know I would.

When using Microsoft's AAD v2 endpoints, you can request access tokens with the correct permissions at any given time.
We are going slightly off topic for this post here. Let's continue.
When to use /.default?
In the 2 scenario's I mentioned above:
client-credentials flow - app only access: When we do service to service calls (B2B)
on behalf of user flow - delegated access: When our api/service is doing api calls on behalf of the user to another api
If you want to know more: Overview of permissions and consent in the Microsoft identity platform - Microsoft Entra | Microsoft Learn
#2 - Add new API client
TLDR
Add app roles in authdemo-dev api client
authdemoapi.read
authdemoapi.manage
#2.1 - Add app roles
For our new service, we'll need to configure a new client in our IDP.
Go to App registrations
Select + New registration
Enter a name: authdemo-apiclient-dev - leave everything else as default

Click <Register>

In our original app registration, authdemo-dev, we will now define the roles we wish to maintain. Just like scopes, the number of roles you wish to configure depends how granular you wish authorization between 2 api's to be.
We'll set up 2 roles, read and manage. For our demo we'll allow access to both for our API client authdemo-apiclient-dev. You'll see when we fetch a token, we'll get both roles in the claims of our jwt token.
#3 - Configure API roles
Go to authdemo-dev
Go to App Roles
Select + Create app role
Enter a display name: Read movie database
Allowed member types: Applications
Enter a value: authdemoapi.read
As mentioned before, I like it to be clear which claims are for an api and which ones are for an interactive flow.
Enter a description
Click <Apply>

Repeat the same for the manage role.

We now configured which roles are allowed for B2B communication. The next part is to allow our client api access to those roles. If we do not configure this, our client API will never be authorized to call our movie API.
Go to authdemo-apiclient-dev
Select API permissions; you'll notice there is already 1 permission there, namely Microsoft Graph (User.Read).
We'll add the 2 configured roles to the client.
Click on <+ Add a permission>
A drawer appears showing 3 tabs:
Microsoft APIs: Endpoints provided out of the box, this ranges from ADO, to Intune, Office 365, Push notifications ... Anything the Azure platform has to offer. This is out of scope for this post.
APIs my organization uses: Services to which your organization has access to, including in case someone else within your organization created the App Registration. You can search for the authdemo-dev app registration here.
My APIs: If you're the one who set up the app registration, this'll make it easier to find your app registration.
Select our api

Then select Application Permissions

Click <add permissions>

Once the roles are added, you'll see the status is "Not granted for <name of organization>". As long as this is the case, your api will not have access to those roles. This part requires an administrator to approve. Why? Otherwise anyone who can set up an API would be able to have access to company sensitive information. Which is exactly why an administrator has to verify if the requested scopes are legit and in scope of an approved project.
Click on " Grant admin consent for <name of organization>".
The final part of configuring an API client is to set up a secret. Remember the name of the oauth flow for API to API communication: client credentials flow. This means we need a credential for our client. We already have our ClientId, this was generated the moment we created an App Registration. However now we also need to configure a secret (a password if you will).
For this, go to the Certificates & secrets tab
Click on <+ New client secret>
Give it a name. Be descriptive. For our demo, I'll just use the same name as our project: "DemoAuth.ApiClient"
Decide when the secret will expire. This is to increase security. If a secret is found by a malicious actor, it will only be valid for the selected amount of time. At least this limits potential exposure. We'll leave ours at the recommended 180 days.
Click <Add>
Your secret has been generated. Keep in mind, this is the only time you can see it's value. If you navigate away from this blade, you'll never be able to recuperate the secret anymore.
Copy the secret value and keep it safe until we get to the point of configuring our settings in our codebase.

Voila, our IDP configuration is done. For now we are only working with 1 API client, who has access to 2 roles. You can also add a 3rd client by configuring only 1 role, read. This could be a simple web application which is to show to users our list of movies.
Code - Set up API client
For this step we're going to set up a console application which is going to call our API. Why do I not use an API here? No particular reason. I think it's practical to know how to set up both an API and a console application. The console application can be used as your basis for a daemon service setup or scheduled jobs.
In essence, setting up an API or a Console application is almost the same, code wise.
#1 - Configure client with IDP information - /.default
For our demo, we'll add a new project in the same solution. Obviously, if this wasn't a demo, we would set up a new solution, repo ...
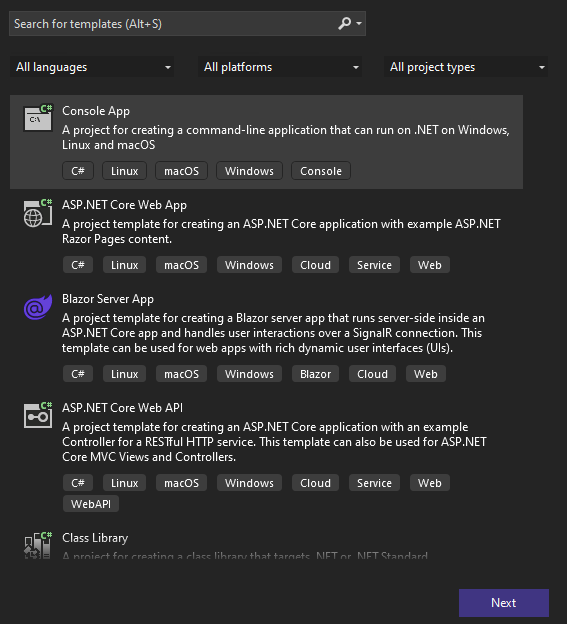
Right click your solution and select Add -> New Project
Choose Console App (C#)
Click <Next>
Give it a name: AuthDemo.ApiClient
Click <Next>
Select framework: .NET 6.0 (Long-term support) - leave the checkbox unchecked
<Create>


We now have a console application with toplevel statements. Top level statements are executed in order how they appear in the file. You can only have 1 source file per solution which contains top level statements. We use this for bootstrapping our application.
What we are doing with a console can also be done using an API project. The only relevant part is to write the code of your HTTP Client.
Follow the steps of Part 1 to set up an API from scratch again and immediately go to #2 - Http client with bearer token
Install the following NuGet packages. Keep in mind, like the setup of the API, 6.x is for .NET 6 If you wish to test with .NET 7, update the versions of the NuGet packages to 7.x as well.
Microsoft.Extensions.DependencyInjection - 6.0.1
Microsoft.Extensions.Hosting - 6.0.1
Microsoft.Extensions.Options - 6.0.0
Microsoft.Extensions.Caching.Memory - 6.0.1
Microsoft.Extensions.Http - 6.0.0
Microsoft.Extensions.Configuration.UserSecrets - 6.0.1
Set up the configuration in appsettings.Development.json
Leave the ClientSecret value as an empty string for now.
"Auth": {
        "Instance": "https://login.microsoft.com/",
        "TenantId": "47e...........5e0",
        "ApiClientSettings": {
            "Credentials": {
                "ClientId": "de0c.......6ae6",
                "ClientSecret": ""
            },
            "DemoAuth": {
                "Url": "https://localhost:7156",
                "Scopes": "api://authdemodev/.default"
            }
        }
}#1.1 - UseSecrets file
Why do I have to leave the ClientSecret empty?
As a developer, we know how easy it is to accidently check in a configuration file. We changed the connection string to our personal database or we added a password which wasn't supposed to be known to others ... Once checked in, it's part of the git history. You can obviously remove it, but wouldn't it be better to just prevent all of this all together?
We're in the process of setting up a secure flow between systems. Why would we, in a file which we are checking in to our git repo, enter sensitive information like a secret?
Microsoft came up with a NuGet package which is very practical for managing passwords, secrets ... without being dependant on external services or tools.
We don't want any sensitive information to be checked in to a source control system. Using a UserSecret file, we tell our application where it can find additional configuration for our application to check. This file is meant to contain only our secrets, passwords, tokens ... Basically it's a local alternative to use services like Azure Keyvault (we won't cover Keyvault now). The UserSecrets extension was created with this in mind. To prevent developers from accidently checking in sensitive configuration data, or data which is only applicable for your own environment.
How does it prevent the user from checking in the file? When we set up a UserSecret file, this file is stored on the user's roaming appdata folder (on Windows): %appdata%/Microsoft/UserSecrets
How do we set this up?
We already installed the required NuGet package: Microsoft.Extensions.Configuration.UserSecrets
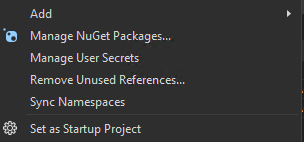
Using Visual Studio, you can right click on your project and then select "Manage User Secrets"
If you do that, you'll get to see a empty JSON file: { }
If you look into your csproj file, you'll notice there is a property added in the xml called "UserSecretsId".
<PropertyGroup>
<OutputType>Exe</OutputType>
<TargetFramework>net6.0</TargetFramework>
<ImplicitUsings>enable</ImplicitUsings>
<Nullable>enable</Nullable>
<UserSecretsId>38014613-53d6-4e51-a065-ff6865a23409</UserSecretsId>
</PropertyGroup>
If you look in the AppData folder (%appdata%/Microsoft/UserSecrets ), you'll see a directory with the same GUID as the UserSecretsId in your csproj. In that folder there is the secrets.json file
In this file, we'll configure our client secret we copied earlier when configuring our IDP settings. There is one difference when we configure our settings in a secrets.json file, unlike the syntax in our regular appsettings files, we here have to configure it in the following syntax:
{
    "Auth:ApiClientSettings:Credentials:ClientSecret": "supersecretvalue"
}
Every property is defined by a semicolon (:). If we look at our appsettings.Development.json, you'll recognize when the semicolons are put.
{
    "Auth": {
        "ApiClientSettings": {
            "Credentials": {
                "ClientSecret": ""
            }
        }
    }
}
Ok, great! But how does our application know there is a secrets.json?
For this we need to configure it using an extension method provided by the UserSecrets NuGet package. This way, we let .NET know, there is a secrets file.
#1.2 - App configuration
Our application needs to be aware there is a(re) configuration file(s) of which it can read values in order to bootstrap and run.
Let's set up another extension class for our app configuration.
Create a new static extensions class , ConfigurationExtensions in Program.Configuration.cs
Add the following:
public static IHostBuilder AddAppConfiguration(this IHostBuilder host, string[] args)
    {
        var environment = Environment.GetEnvironmentVariable("ASPNETCORE_ENVIRONMENT") ?? Environments.Development;

        host.UseEnvironment(environment)
            .ConfigureAppConfiguration((context, builder) =>
         {
             builder.SetBasePath(Directory.GetCurrentDirectory());
             builder.AddJsonFile("appsettings.json", optional: false, reloadOnChange: true);
             builder.AddJsonFile($"appsettings.{context.HostingEnvironment.EnvironmentName}.json", optional: true, reloadOnChange: true);
             builder.AddUserSecrets<Program>();
             builder.AddEnvironmentVariables();
             builder.AddCommandLine(args);
         });

        return host;
    }

public static IServiceCollection AddOptionsConfiguration(this IServiceCollection services, HostBuilderContext hostContext)
    {
        services.Configure<Auth>(hostContext.Configuration.GetSection(nameof(Auth)));

        return services;
    }
A few things are being set up here:
We make our application environment aware - This allows us to set up configuration for multiple environments (local, development, qualityassurance, staging, production ...)
We add support of user secrets
We allow access to environment variables - By having access to environment variables, we can say to our application: Run in "Development" mode. This is done by reading the ASPNETCORE_ENVIRONMENT variable It defaults to Development in case no value is found.
We can parse commandline arguments - Not applicable for our demo. But I found out I needed this more often then not when setting up my daemon services. At least you know it exists now.
IOptions pattern - The IOptions pattern allows us to access configuration data in a strongly typed way. What does this mean?
Instead of having this all over your project: configuration["Auth:ApiClientSettings:Credentials:ClientSecret"]
We can now inject an object through Dependency Injection like this:
public AccessTokenService(IOptions<Auth> authsettings){ ... }In our Program.cs we add the following:
using Microsoft.Extensions.DependencyInjection;
using Microsoft.Extensions.Hosting;

var hostBuilder = Host.CreateDefaultBuilder(args)
    .AddAppConfiguration(args);

hostBuilder.ConfigureServices((context, services) =>
{
    services.AddOptionsConfiguration(context);

    services.AddMemoryCache();
    services.AddHttpClient();
});

var host = hostBuilder.Build();
await host.RunAsync();
How do we define environment variables locally?
When executing your code in Visual Studio, you can set an environment variable in the properties menu of your project. Right click on your project -> Properties Scroll down (I'm using Visual Studio 2022) until you get to the Debug section
Click on "Open debug launch profiles UI"
In here you can set up Environment Variables.

When executing from a command line - Let's say you you have 5 Micro Services, you're working on 1 but require the other 4 to run locally as well. Rather than opening 4 IDE's just to have your APIs available, you can just run it from command line. It takes less resources.
Create a bat file and enter the following
set ASPNETCORE_ENVIRONMENT=Development
pushd <drive>\demoauth\bin\debug\net6.0
dotnet <drive>\demoauth\bin\debug\net6.0\demoauth.dll
Double click on the bat file, your application runs.
Tip: If you wish to create a class from a JSON object very easily, you can do this using Visual Studio's feature "Paste JSON as Classes"
How?
Copy the JSON object
Create a new class file
Go to Edit - Paste Special - Paste JSON As Classes
This will generate C# classes out of your selected JSON.
This was the basic bootstrapping of configuration files to support multiple environments and securing sensitive info during development.
Press F5 to test if your application is working. The output should look as follows:

#2 - Http client with bearer token
When I started this serie of blog posts, in Part 1, I mentioned I like to keep my source code clean. Whenever I have to write the same code at least twice, I will immediately refactor it into a shared method, class. A certain degree of OCD is advisable. ;-)
"Always code as if the guy who ends up maintaining your code will be a violent psychopath who knows where you live." - John Woods
One of the goals as a software developer is to make your code easy to use for other members in your team. You will see I'll add some abstractions just so that when someone else has to use my code, they only have to write a few lines.
Our goal:
var result = await GetAsync<IEnumerable<Movie>>("/movies", cancellationToken);
...
var result = await DeleteAsync<string>("/movies/{id}", cancellationToken);
This makes it easier to do code reviews, it state very clearly what it does. An HTTP GET or an HTTP DELETE.
We'll add some classes
AzureAdTokenResponse: Model of what is returned from Azure AD when requesting an access_token.
AccessTokenService: Responsible for returning a valid access_token from our idp
BaseIntegrationService: An abstract class to group together the http protocol methods (get, post, delete ...)
MoviesIntegrationService: Service responsible for communicating with our secure API, inherits BaseIntegrationService.
HostedService: We imagine our client to be a "background" service. This will be our entry point for our business logic.
Because HostedService is a singleton, we'll have to register our services, for the time being, also as a singleton. We don't have to do this. But for this part in the demo, we are not going any deeper into it.
AzureAdTokenResponse:
/// <summary>
/// Model returned by Azure AD when using client_credentials flow
/// </summary>
internal class AzureAdTokenResponse
{
     /// <summary>
     /// Type of token (i.e. Bearer).
     /// </summary>
     [JsonProperty("token_type")]
     public string TokenType { get; set; }

     /// <summary>
     /// Time (in seconds) when token expires.
     /// </summary>
     [JsonProperty("expires_in")]
     public ushort ExpiresIn { get; set; }

     /// <summary>
     /// Epoch (linux) timestamp when token expires.
     /// </summary>
     [JsonProperty("expires_on")]
     public uint ExpiresOn { get; set; }

     /// <summary>
     /// The actual access token.
     /// </summary>
     [JsonProperty("access_token")]
     public string AccessToken { get; set; }
}
AccessTokenService:
We are fetching an access token from our IDP. Whenever we get a token back, we cache the token for the duration of it's validity minus 30 seconds (to have plenty of time to fetch a new one before the token expires).
Why do we cache the token? If we don't, we're going to spam our IDP every time we perform an API call. Meaning, every API call to our Movies endpoint would result in another API call to our IDP. This is obviously not good. Hence the caching.
If you are client to multiple APIs, than obviously you'll have to cache multiple access tokens. One per API.
internal interface IAccessTokenService
{
	/// <summary>
	/// Retrieve an accesstoken.
	/// </summary>
	/// <param name="cancellationToken"></param>
	/// <returns></returns>
	Task<string> GetAccessTokenAsync(CancellationToken cancellationToken);
}

public class AccessTokenService : IAccessTokenService
{
	private readonly IHttpClientFactory _httpClientFactory;
	private readonly IMemoryCache _cache;
	private readonly Auth _authSettings;

	public AccessTokenService(IHttpClientFactory httpClientFactory, IMemoryCache cache, IOptions<Auth> authSettings)
	{
		_httpClientFactory = httpClientFactory;
		_cache = cache;
		_authSettings = authSettings.Value;
	}

	public async Task<string> GetAccessTokenAsync(CancellationToken cancellationToken)
	{
		const string cachekey = "authdemoapi";
		if (_cache.TryGetValue<AzureAdTokenResponse>(cachekey, out var token))
		{
			return token.AccessToken;
		}

		var url = $"{_authSettings.TenantId}/oauth2/v2.0/token";
		var body = new FormUrlEncodedContent(new Dictionary<string, string>
		{
			{ "grant_type", "client_credentials" },
			{ "client_id", _authSettings.ApiClientSettings.Credentials.ClientId },
			{ "client_secret", _authSettings.ApiClientSettings.Credentials.ClientSecret },
			{ "scope", _authSettings.ApiClientSettings.DemoAuth.Scopes },
		});

		using (var client = _httpClientFactory.CreateClient())
		{
			client.BaseAddress = new Uri(_authSettings.Instance);
			var httpResponse = await client.PostAsync(url, body);
			var responseContent = await httpResponse.Content.ReadAsStringAsync();

			if (!httpResponse.IsSuccessStatusCode)
			{
				throw new UnauthorizedAccessException($"Unable to get an access token for scope: {_authSettings.ApiClientSettings.DemoAuth.Scopes}\n\r{responseContent}");
			}
			var tokenResponse = JsonConvert.DeserializeObject<AzureAdTokenResponse>(responseContent);

			_cache.Set(cachekey, tokenResponse, DateTimeOffset.UtcNow.AddSeconds(tokenResponse.ExpiresIn - 30));
			return tokenResponse.AccessToken;
		}
	}
}
BaseIntegrationService:
To hide away the "complexity" of initializing an HttpClient, we create a base class. Whenever a developer is going to execute an http request, we'll make sure the proper headers are already set.
authorization: Bearer ...
api-version: 1.0
public abstract class BaseIntegrationService
{
	private readonly IHttpClientFactory _httpClientFactory;
	private readonly IAccessTokenService _accessTokenService;
	private readonly Auth _authSettings;
	protected readonly ILogger Logger;

	/// <summary>
	/// CTor
	/// </summary>
	/// <param name="httpClientFactory"></param>
	/// <param name="accessTokenService"></param>
	/// <param name="logger"></param>
	public BaseIntegrationService(IHttpClientFactory httpClientFactory, IAccessTokenService accessTokenService, IOptions<Auth> authSettings, ILogger logger)
	{
		_httpClientFactory = httpClientFactory;
		_accessTokenService = accessTokenService;
		_authSettings = authSettings.Value;
		Logger = logger;
	}

	private async Task<HttpClient> GetHttpClient(CancellationToken cancellationToken, bool forceNewSession = false)
	{
		var token = await _accessTokenService.GetAccessTokenAsync(cancellationToken);

		var client = _httpClientFactory.CreateClient("moviesclient");
		client.BaseAddress = new System.Uri(_authSettings.ApiClientSettings.DemoAuth.Url);
		client.Timeout = TimeSpan.FromSeconds(30);

		client.DefaultRequestHeaders.Authorization = new System.Net.Http.Headers.AuthenticationHeaderValue("Bearer", token);
		client.DefaultRequestHeaders.Add("api-version", "1.0");

		return client;
	}

	private async Task<T> InvokeHttpRequest<T>(Func<HttpClient, string, CancellationToken, Task<HttpResponseMessage>> func, string url, CancellationToken cancellationToken)
	{
		using var client = await GetHttpClient(cancellationToken);
		try
		{
			var httpResponse = await func(client, url, cancellationToken);
			var responseContent = await httpResponse.Content.ReadAsStringAsync();

			if (!httpResponse.IsSuccessStatusCode)
			{
				Logger.LogError("<Movies Api> Http request (url: {0}) failed with an unsuccessful statuscode (Code: {1}). Response: {2}", url, httpResponse.StatusCode, responseContent);
				return default;
			}

			if (string.IsNullOrEmpty(responseContent)) return default;

			return JsonConvert.DeserializeObject<T>(responseContent);
		}
		catch (Exception ex)
		{
			Logger.LogError($"<Movies Api> An exception ocurred: {ex.Message}", ex);
			throw new Exception(JsonConvert.SerializeObject(new { Url = url, Message = ex.Message }), ex);
		}
	}

	/// <summary>
	/// Execute an HTTP GET for the given relative url.
	/// </summary>
	/// <typeparam name="T">Type of data to return.</typeparam>
	/// <param name="url">Relative url (i.e.: /movies)</param>
	/// <param name="cancellationToken"><see cref="CancellationToken"/></param>
	/// <returns></returns>
	protected async Task<T> GetAsync<T>(string url, CancellationToken cancellationToken) where T : class, new()
	{
		var result = await InvokeHttpRequest<T>(async (client, relativeUrl, token) =>
		{
			return await client.GetAsync(relativeUrl, cancellationToken);
		}, url, cancellationToken);
		return result;
	}

	/// <summary>
	/// Execute an HTTP DELETE for the given relative url.
	/// </summary>
	/// <typeparam name="T">Type of data to return.</typeparam>
	/// <param name="url">Relative url (i.e.: /movies/1)</param>
	/// <param name="cancellationToken"><see cref="CancellationToken"/></param>
	/// <returns></returns>
	protected async Task<T> DeleteAsync<T>(string url, CancellationToken cancellationToken)
	{
		var result = await InvokeHttpRequest<T>(async (client, relativeUrl, token) => { return await client.DeleteAsync(relativeUrl, cancellationToken); }, url, cancellationToken);
		return result;
	}

	/// <summary>
	/// Execute an HTTP POST for the given relative url.
	/// </summary>
	/// <typeparam name="T">Type of data to return.</typeparam>
	/// <param name="url">Relative url (i.e.: /v2/services/projects)</param>
	/// <param name="body">Payload to send</param>
	/// <param name="cancellationToken"><see cref="CancellationToken"/></param>
	/// <returns></returns>
	protected async Task<T> PostAsync<TBody, T>(string url, TBody body, CancellationToken cancellationToken) where T : class, new()
	{
		var result = await InvokeHttpRequest<T>(async (client, relativeUrl, token) => { return await client.PostAsync(relativeUrl, new StringContent(JsonConvert.SerializeObject(body), Encoding.UTF8, "application/json"), cancellationToken); }, url, cancellationToken);
		return result;
	}
}
MoviesIntegrationService:
Which endpoints do we call, this is added in the integration service. Now we only have endpoints for movies. But in the future, if we need one for users, we'd create a separate integration service for managing users.
public class MoviesIntegrationService : BaseIntegrationService, IMoviesIntegrationService
{
	public MoviesIntegrationService(IHttpClientFactory httpClientFactory, IAccessTokenService accessTokenService, IOptions<Auth> authSettings, ILogger<MoviesIntegrationService> logger):
		base(httpClientFactory, accessTokenService, authSettings, logger)
	{
	}

	public async Task<IEnumerable<Movie>> GetAllMoviesAsync(CancellationToken cancellationToken)
	{
		return await GetAsync<List<Movie>>("/movies", cancellationToken);
	}

	public async Task<string> RemoveOneMovieAsync(string id, CancellationToken cancellationToken)
	{
		return await DeleteAsync<string>($"/movies/{id}", cancellationToken);
	}
}
HostedService:
To have an entry point for our business logic to be triggered, we need a hosted service.
We inject our movies integration service so we can test our API call.
public class HostedService : IHostedService
{
	private readonly IMoviesIntegrationService _moviesIntegrationService;
	private readonly ILogger _logger;

	public HostedService(
		IMoviesIntegrationService moviesIntegrationService,
		ILogger<HostedService> logger,
		IHostApplicationLifetime appLifetime
		)
	{
		_moviesIntegrationService = moviesIntegrationService;
		_logger = logger;

		appLifetime.ApplicationStarted.Register(OnStarted);
		appLifetime.ApplicationStopping.Register(OnStopping);
		appLifetime.ApplicationStopped.Register(OnStopped);
	}
	public async Task StartAsync(CancellationToken cancellationToken)
	{
		_logger.LogDebug("1. {0} has been called.", nameof(StartAsync));
	}

	public async Task StopAsync(CancellationToken cancellationToken)
	{
	}

	private async void OnStarted()
	{
		_logger.LogDebug("2. OnStarted has been called.");

		try
		{
			var result = await _moviesIntegrationService.GetAllMoviesAsync(default);
			_logger.LogInformation(JsonConvert.SerializeObject(result));

			var deletedResult = await _moviesIntegrationService.RemoveOneMovieAsync("10", default);
			_logger.LogInformation(deletedResult);
		}
		catch(Exception ex)
		{
			_logger.LogError(ex, ex.Message);
		}
	}

	private void OnStopping()
	{
		_logger.LogDebug("3. OnStopping has been called.");
	}

	private void OnStopped()
	{
		_logger.LogDebug("5. OnStopped has been called.");
	}
}
Create a new extensions class, ServicesExtensions, add a new static method, AddServices()
public static IHostBuilder AddServices(this IHostBuilder host, string[] args)
{
    host.ConfigureServices((context, services) =>
    {
        services.AddSingleton<IAccessTokenService, AccessTokenService>();
        services.AddSingleton<IMoviesIntegrationService, MoviesIntegrationService>(); //singleton because hostedservice is singleton

        services.AddHostedService<HostedService>();

        services.AddOptionsConfiguration(context);

        services.AddMemoryCache();
        services.AddHttpClient();
    });

    return host;
}
Change the content of Program.cs as follows:
using Microsoft.Extensions.Hosting;
using Microsoft.Extensions.Logging;

var hostBuilder = Host.CreateDefaultBuilder(args)
    .AddAppConfiguration(args)
    .AddServices(args);

hostBuilder.ConfigureLogging((context, builder) =>
{
    builder.AddConfiguration(context.Configuration.GetSection("Logging"));
});


var host = hostBuilder.Build();
await host.RunAsync();
We're done writing code. Now it's time to debug.
In our case, we have to execute 2 projects at the same time. In Visual Studio you can easily start debugging 2 (or more) projects if you press F5 (debug).
Right click on your solution
Select properties
Choose "Multiple startup projects:"
And select the ones you wish to debug every time you press F5.

Press <F5>

Access token payload. As you can see in the roles claim, we have both of our configured roles in there.
{
  "aud": "api://authdemodev",
  "iss": "https://sts.windows.net/47e......................55e0/",
  "iat": 1674334598,
  "nbf": 1674334598,
  "exp": 1674338498,
  "appid": "de0c55......................f6ae6",
  "appidacr": "1",
  "idp": "https://sts.windows.net/47e......................55e0/",
  "oid": "86c89..............28dd7a",
  "roles": [
    "authdemoapi.read",
    "authdemoapi.manage"
  ],
  "sub": "86c89..............28dd7a",
  "tid": "47e......................55e0",
  "ver": "1.0"
}
Recap
In this post we covered how to access an API from a (daemon) service. This is how typical B2B usecases are set up.
We configured our IDP to allow a client credentials flow between 2 services
We set up a new type of project, daemon service.
We introduced a new feature: UserSecrets, which helps us as developers not to publish passwords or other sensitive data into our git repo's.
We wrote code to get an access_token from our IDP, in this case Azure AD.
We were able to access our protected resources using our new api client.
Note: We now only authorized by verifying we are an identity which is known on the platform. We're basically checking the badge "Ok, you're from this organization". The next step is to limit access, even if you're authorized. That's where scope based access comes into play.
The source code of this post can be found on my github repo.
Stay tuned for Part 4 - Configure access based on scope.


Comments